Skill Level:
Crafting Time:
Technique(s):
Material(s):
Category:
Share This Craft
Search Crafts
Retro Beaded Stocking

If vintage Christmas is your style or if you’re filled with nostalgic holiday feelings, deck your fireplace with this multicolored, handmade stocking. The vertical pattern accentuates the stocking’s slender silhouette and reminds us of a retro wallpaper design. The bold colors give the stocking an energetic air, and the faceted bead accents provide just a hint of glint. This one’s sure to liven up your mantel and holiday décor!
Supplies & Tools:

- Printable template (download here)
- 0.25 yard dark blue felt*
- 1 sheet (9" x 12") felt of each: purple, red, green, bright green, gold, bright blue
- 5/8" wide ribbon, 10" long
- Tape
- Scissors
- Marker
- Straight pins
- Sewing machine
- Dark blue thread
- Needle
- 4mm multi-color faceted beads
- Optional: green and red thread for sewing marquise shapes and beads
*If felt fabric is 72 inches wide, you only need 0.25 yard. If felt fabric is 36 inches wide, you will need 0.5 yard.
Directions:
- Print the template.
- Cut out the template pieces. For the stocking itself, line up the dashed lines, overlapping the shaded tabs, and tape pieces together.
- If needed, iron the dark blue felt on low heat to remove any wrinkles.
- Place the pattern on the dark blue felt and trace 2 stocking shapes with marker.
- Cut out the stocking shapes and set aside.
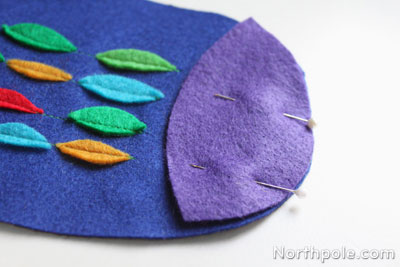
- Place the toe and heel patterns on purple felt and trace. Cut out the toe and heel shapes and set aside.
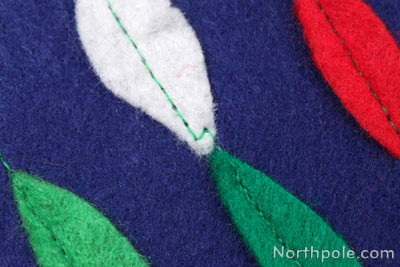
- Cut out marquise shapes from the other 4 felt sheets. You’ll need about 50 shapes total. Use the patterns if you like, but we think it is easier to simply eyeball it. Don’t worry about cutting identical shapes; slightly different shapes and sizes will add visual interest to your stocking.
- Take one stocking piece and lay it on your work surface.
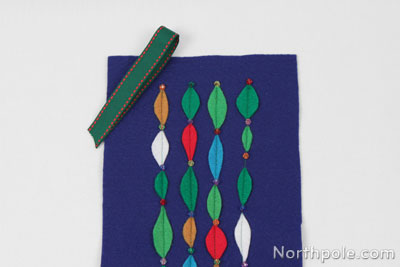
- Lay the marquise shapes tip to tip on the stocking, creating columns of shapes. Try to distribute the colors evenly across the stocking. The marquise shapes are too small to pin, but that’s okay. The felt basically sticks to itself, so there’s no need to pin down small shapes like these.
- Larger shapes, however, are a different story. Lay the heel and toe pieces on the stocking and pin in place.
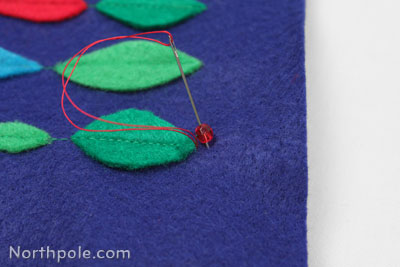
- Sew down the marquise shapes. This can be a little tricky, as the tips of the shapes tend to end up between the presser foot’s prongs instead of under them. But don’t fret—we have perfected the method for you:
- At the beginning of one column, position the tip of the first shape under the presser foot. Lower the presser foot and begin sewing. Back tack to lock the thread and then continue sewing forward in a straight line.
- Stop sewing when you reach the tip of the next shape.
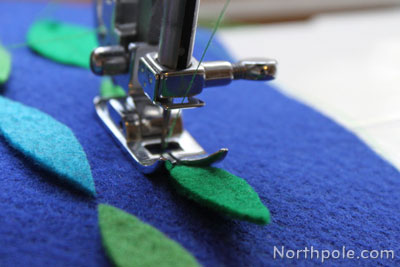
- Lower the needle to hold the stocking in place. If you forget to lower the needle, your stocking might move, and you’ll end up with a crooked line like this:
- Raise the presser foot and press the shape down so its tip is under the presser foot.
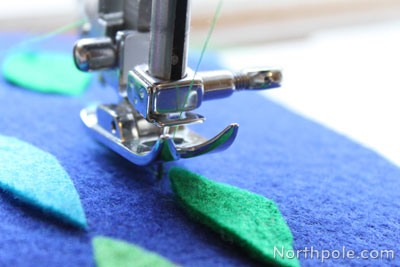
- Lower the presser foot and continue sewing in a straight line.
- Repeat steps 11B–11E for each shape. This may sound tedious, but it goes fast once you get into a rhythm.
- After you’ve sewn over the last shape in the column, back tack to lock the thread.
- Repeat steps 11A–11G for each column.
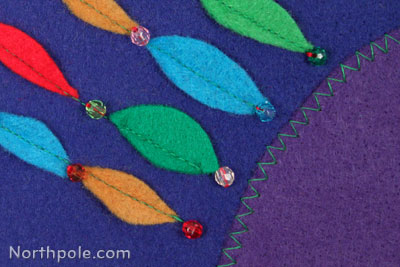
- Use a zigzag stitch to sew the toe and heel pieces in place. You only need to sew the inner arcs as the arcs along the edge of the stocking will get sewn in steps 15–16.
- Now add a bead in between each of the marquise shapes and at the ends of each column. We highly recommend tying off each individual bead to keep the beads properly in place. (Since there’s so much space between each bead, the beads will not be very secure if you add them with a continuous piece of thread.)
- To start, pull the needle and thread up from the back of the stocking. No need to tie a knot in your thread here because you will tie it in just a few moments. (Just don’t pull too hard on your thread!)
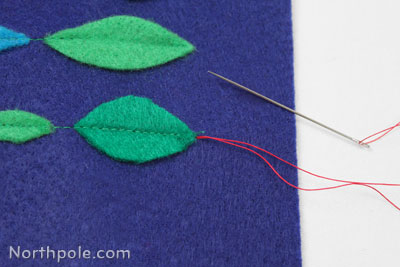
- Add a bead to the needle/thread and insert the needle into the felt about 4mm (bead’s width) from the other end of the thread (where you initially pulled the thread through).
- Flip the felt over and tie a double knot. Trim the thread.
- Repeat for each additional bead.
Note: Instead of haphazardly adding beads, consider the color of the marquise shapes and try to balance colors across the stocking. For more tips on adding the beads, see the Elfy Hints below.
- To start, pull the needle and thread up from the back of the stocking. No need to tie a knot in your thread here because you will tie it in just a few moments. (Just don’t pull too hard on your thread!)
- Now put the stocking pieces together so you can sew them.
- Place the beaded piece on the table, right side up.
- Fold the ribbon in half and place near the upper left corner of the stocking. The ends of the ribbon should extend past the left side the stocking while the loop of the ribbon should extend above the top of the stocking.
- Place the blank stocking piece on top.
- Pin the pieces together.

- Begin sewing the pieces together with your sewing machine, using a 0.25" seam allowance. Make sure you back tack at the beginning, then continue sewing.
Note: An easy way to get a 0.25" seam allowance is to align the edge of the felt with the presser foot. - Sew around the stocking, removing pins as you go. When you reach the end, back tack to lock the thread.
Note: When you sew over the ribbon, back tack over it and then sew forward again to reinforce the ribbon, as this will make the hanger stronger. - Remove any remaining pins and set aside.
- Turn the stocking right side out and press with a cool iron.
- Now you have a colorful, retro-looking stocking!

Elfy Hints:
- When selecting what color bead to sew next to a marquise shape, choose a bead of a contrasting color. For example, use a red or orange bead next to a green shape, as a green bead won’t show up well next to a green shape.
- If your columns became a little uneven when you were sewing, don’t worry! You can use the beads to hide your mistakes. Take this, for example:
- See how the gold shape is farther away from the purple toe piece than the others?
- Because there was such a large gap between the gold shape and the stocking toe, we added a red bead. Notice how the bead is below the tip of the gold shape so that it fills in more of the gap.
- Where the green and blue shapes are, we added similarly colored beads that overlap the shapes’ tips for minimal contrast.
- With our beaded trickery, each column now appears to be the same length!
- See how the gold shape is farther away from the purple toe piece than the others?