Skill Level:
Crafting Time:
Material(s):
Category:
Tag(s):
Share This Craft
Search Crafts
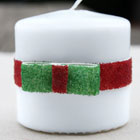
Christmas Keepsake Box

We would like to thank Charlene, a friend of the elves, for sharing this craft! This box is a wonderful gift box and keepsake. By simply choosing different fabric, you can make this box for any season or occasion! These directions are for a 9 x 9 x 5 inch box, but if you’d like to assemble an 8 x 8 x 4 one, simply subtract an inch from all measurements. For a 10 x 10 x 6 box, add one inch to all measurements.
By the way, if you notice a sweet, furry face in some of the photos below, that’s
Supplies & Tools:

- Printable template (download here)
- 1 yard Christmas fabric
- One 9" x 9" x 5" papier-mâché box
- 0.5 yard high quilting loft
- 1 sheet poster board
- 1.5 yards Wright’s maxi piping (or any small piping with a lip)
- 2 yards 1" ribbon
- 1 yard 1/8" ribbon
- 1 large sleigh bell
- Iron & ironing board
- One 5"–7" doll making needle
- Yardstick
- Mini hot glue gun & glue sticks
- Scissors
- Pen
Directions:
Measure and Cut Fabric:
- Print the template and set aside for future reference.
- Iron the fabric.
- Place fabric on a flat surface.
- Measure and draw the 5 pieces with the yardstick and pen (see pieces 1, 2, and 3 on the template). Make sure the design pattern is facing in the correct direction.
- Cut out the pieces.
Fold, Glue, and Iron the Box Bottom Fabric (Piece 3):
- Fold and iron a 1" hem along the bottom side of fabric (piece 3).
- Lightly glue the hem.
Note: To make an clean and easy hem, you can use Stitch Witchery instead. - Iron the hem.
- Repeat steps 1–3 for one of the short sides.
Note: You can trim the fabric at the corners so that it isn’t bulky.
- Now you have the side piece for the box bottom with a 1" bottom hem and one 1" side hem.

- Your 5 fabric pieces are now ready for assembly.
Measure and Cut Poster Board for Top and Bottom Box Beds (Inside the Lid and Box):
- Measure and draw one 8.75" x 8.75" square for box top bed. Cut out.
- Measure and draw one 8.5" x 8.5" square for box bottom bed. Cut out.
Measure and Cut Quilting Loft:
- Measure and cut two 9" x 9" squares for the top of the box lid.
- Measure and cut one 8.5" x 8.5" square for the box bottom bed.
Prepare Box Top for Sleigh Bell Attachment:
- Draw two diagonal lines from corner to corner on the top of the box lid so that the lines form an X.

- Punch a hole on either side of the X with the doll making needle.

Prepare the Box Bottom Bed:
- Gather 1 piece of fabric (piece 2), the 8.5" square poster board, and the 8.5" square loft.
- Glue the loft square to the poster board at the four corners. Only a small amount of glue is needed at each corner.

- Place fabric on a flat surface, backside facing up.
- Place the lofted poster board in the center of fabric, loft side facing down.

- One side at a time, fold and glue fabric edges over poster board sides until all four sides are done.

Prepare the Box Top Bed:
- Gather 1 piece of fabric (piece 2) and the 8.75" square poster board.
- Place fabric on a flat surface, backside facing up.
- Place the poster board in the center of fabric.

- One side at a time, fold and glue fabric edges over poster board sides until all four sides are done.

- You now have all pieces necessary for box assembly
Box Bottom Assembly:
- Gather last square of fabric (piece 2), box bottom fabric (piece 3), box bottom, maxi piping, and box bottom bed.
- Place fabric square on a flat surface, backside facing up.
- Center box on fabric.

- Holding box firmly in place, fold one side of fabric up and glue all the way across the side.
Note: You can temporarily tape the opposite side to help hold fabric in place while you glued it.
- Slightly stretch fabric on opposite side, fold and glue all the way across that side.

- Repeat step 5 for the remaining two sides.
- Trim any excess fabric from the corners.

- Begin gluing the maxi piping with the lip facing up and piping side flush with bottom of box all around box bottom, overlapping the ends.

- Place hemmed side of fabric flush with piping at the corner of the box.
- Start gluing fabric 1" from the corner of the box, gluing where the fabric meets the piping. You want to have this flap of fabric so that you can tuck the other end underneath.

- Glue fabric all around bottom of box (near piping) until you reach the last corner.
- Fold and glue the fabric over the last corner and under the 1" flap. Trim off any excess fabric.

- Glue the flap over the fabric beneath, starting at the bottom of the flap and work up the side of the box.

- Push the fabric inside the box, stretching and gluing the fabric to the inside angles of the box and pushing into the corners to fit.
Note: To keep from burning your fingers on the glue, use a piece of cardboard to press the fabric into the corners of the box.
- Put glue in center of the box and place bottom box bed into the box.

- Lift each corner and add glue, pressing firmly in place.

- Box bottom is done.
Box Top Assembly:
- Gather two 9" x 9" pieces of loft, the box top, fabric (piece 1), 1" ribbon, sleigh bell, 1/8" ribbon, and the box top bed.
- Place the fabric on a flat surface, backside facing up.
- Glue the 2 pieces of loft together by applying a small dot of glue at the corners.
- Glue the loft to the box top lightly at the corners.
- Center the box top onto the fabric rectangle, loft facing down.

- Starting at short side of fabric and holding box top firmly in place, fold fabric over edge of box and into inside of box. Glue fabric to inner angles of the box top.
- Stretching slightly, repeat step 6 on opposite side of box top.
- Fold the long sides as if you are wrapping a gift package and fold edges over.

- Glue to the inner angles of the box top.

- Cut 2 (two) 17" pieces of 1" ribbon.
- Place 1 piece of ribbon across the top of the box, letting the ends hang down equal length on both sides.
- Fold each end over the edges of box on each side and glue in the angle of box top.
- Criss-cross second piece of 1" ribbon over the box top. Repeat steps 10 and 11.

- Now, you can attach a bow or a bell in the center of the box top. To attach a bell, follow steps 15–16. To attach a bow (no bell) skip to step 18.
- To attach a bell: Thread 1/8" ribbon through doll making needle. Starting from the inside, pierce through one of the holes in the center of the box top, through the loft, fabric, and ribbon. Thread through the sleigh bell and back through the box top and second hole. Tie the ribbon tightly into a knot in the inside of the box.
- Cut a 36" piece of 1" ribbon. Tie around base of sleigh bell forming a bow. Let the ends drape over the sides of the box top. Skip to step 19.
- To attach a bow only: Cut a 36" piece of ribbon and tie a bow.
- Thread 1/8" ribbon through doll making needle. Starting from the inside, pierce through one of the holes in the center of the box top, through the loft, fabric, and ribbon. Thread through the center of bow and back through the box top and second hole. Tie the ribbon tightly into a knot in the inside of the box.
Note: If using a stiff ribbon, see below. - Place top bed on inside of box top and glue in center. Lift each corner and add glue, then press firmly in place.
Working with Stiff Ribbon:
Working with stiff ribbon can be tricky and unyielding sometimes, so you have to outsmart the ribbon. We'll show you how we made a pretty bow with some stiff glittery ribbon. Our ribbon is 1.5" wide, so you may need to adjust the following measurements based on the width of your ribbon.
- Cut the following pieces: one 14" piece (bow loops), one 4" piece (the “knot” around the center), and two 7" pieces (tails—cut the ends at an angle).
- Take the 14" piece and make a loop, overlapping the ends about 1". Use a small dot of hot glue to hold ends together. Press 2 sides together, forming the 2 loops of the bow.

- Take the 4" piece and fold around the bow loops. Notice how there the ribbon is folded on the back side: one flap is 1" long, and the other flap is 0.5" long.

- Arrange the tails, bow loop, and “knot” on the box top. You can use a paper clip to help hold them in place.

- Thread 1/8" ribbon through doll making needle. Starting from the inside, pierce through one of the holes in the center of the box top, through the loft, fabric, and ribbon. Thread through the pieces of the bow: the tails, the bow loop, and the back tab of the “knot” ribbon. Thread back through the box top and second hole. Tie ribbon tightly in a knot inside the box top.

- Fold the “knot” ribbon over the bow to hide the 1/8 ribbon. Use glue to hold it in place.

- For extra stability, add glue under each tail and the bow.