Skill Level:
Crafting Time:
Technique(s):
Material(s):
Category:
Tag(s):
Share This Craft
Search Crafts
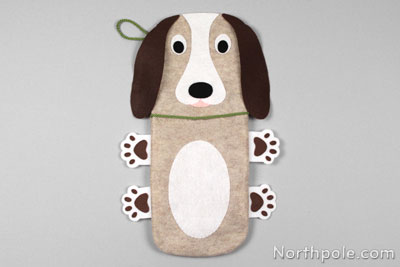
Adorable Doggie Stocking

If you’ve adopted a fur baby into your family, this dog-shaped stocking is perfect for your new pup! We chose brown, tan, and white for our stocking, but, of course, you can change the colors to match your doggie’s fur. Plus, this cute stocking doesn’t have to just be for your pet—you can make one for each member of your family. Have fun personalizing each one by changing the collar color or adding accessories such as a bow tie!
Supplies & Tools:

- Printable template (download here)
- 0.5 yard tan felt
- 1 sheet (9" x 12") stiff white felt
- 2 sheets (9" x 12") white felt
- 1 sheet (9" x 12") felt of each: brown, black, pink
- 2 pieces of thin, decorative rope, each 10" long
- Thread: brown, white, and tan
- Scissors
- Needle
- Tape
- Black Sharpie
- Straight pins
- Fabri-Tac® glue
- Sewing machine
- Iron
- Materials for name tag:
- Frosted Ruff N’ Ready Shrinky Dinks®
- Red fine point Sharpie
- White colored pencil
- One-hole punch
- 8mm jump ring
- Oven
Directions:
Prep the Materials:
- Print the template.
- Cut out the template pieces. To assemble the body piece, line up the dashed lines, overlapping the shaded tabs, and tape pieces together.
- Cut out the other pattern pieces (except the dog bone) and set aside.
- If needed, iron the felt on low heat to remove any wrinkles.
Note: If low heat isn’t getting out the wrinkles, try increasing the heat a little. Just be careful because acrylic and eco-felt will melt if the temperature is too high! - Place the pattern pieces on felt and trace with a marker. Refer to the pattern pieces for the recommended colors for each piece. Set pattern pieces aside and cut the pieces out the felt.
- Body – Cut 2.
- Ears – Cut 2.
- Eyes – Cut 2.
- Pupils – Cut 2.
- Nose – Cut 1.
- Tongue – Cut 1.
- Face stripe – Cut 1.
- Paws – Cut 4 pieces from stiff white felt.
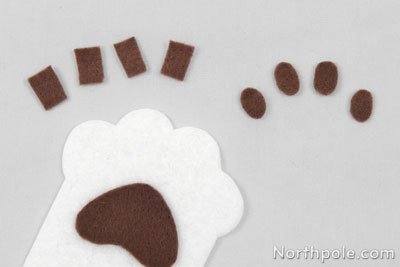
- Paw pads – Cut 4 pieces.
- Paw toes – Cut 16 pieces. (See Elfy Hints below.)
- Tummy – Cut 1.
- Tail – Cut 2.
- Tail tip – Cut 2.
Make the Doggie’s Features:
- Place the paw pads and toes on the paw pieces. Once you are happy with the placement, lift one toe/pad at a time and use Fabri-Tac to glue them in place. Set paws aside.
- Glue the pupils on the eyes. We think it looks best when the pupil is slightly below the center of the eye. Set eyes aside.
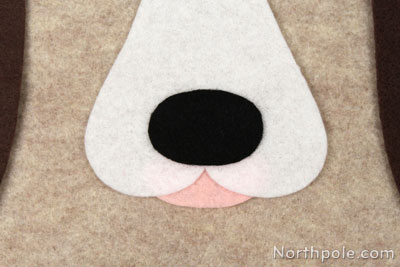
- Make the dog’s snout:
- Glue the nose on top of the face stripe piece just above the crest.
- Position the tongue under the face stripe piece so that it looks like the dog is sticking his tongue out. Glue the tongue to the back of the face stripe piece. Now the dog’s snout is complete. Set aside.
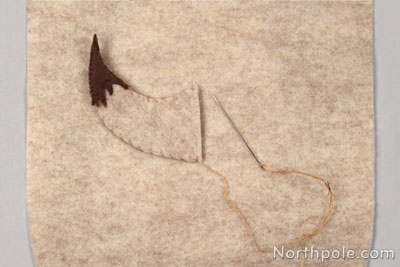
- Next, you’ll make the dog’s tail:
- First, stack the two tail pieces. Whipstitch these two pieces together with tan thread along the two curved sides only. Leave the short, straight side open for now.
- Add a tail tip on each side of the tail. Sewing through all 4 layers along the two curved sides, whipstitch the tail tips onto the tail with brown thread.
- Use a bit of Fabri-Tac to glue down the remaining spiky parts of the tail tip.
Attach the Doggie’s Features:
- Place the eyes, snout, ears, collar (which is one of the pieces of rope), and tummy on one body piece. Arrange the pieces so that everything looks good, and then glue the eyes down with Fabri-Tac.
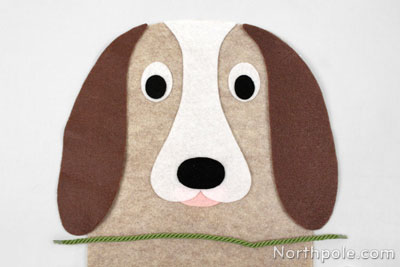
- Use straight pins to tack down the tummy and the snout. Set the collar and ears aside.
- Use white thread to sew around the edges of the snout. Only sew around the edges of the white felt—do not sew the edges of the tongue. Remove pins and set aside.
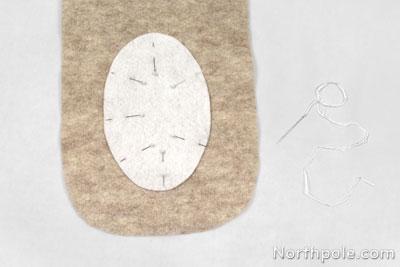
- Use white thread to sew around the tummy. Remove pins and set aside.
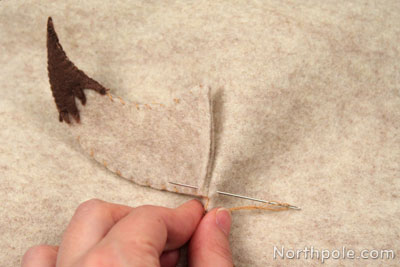
- To sew the tail onto the body, grab the other body piece and place the tail on the lower portion of the felt.
- Pinch the felt in the middle, vertically (as shown below). Then whip stitch the tail to the fold line with very small stitches. Tie off thread and trim.
Here’s a closer look: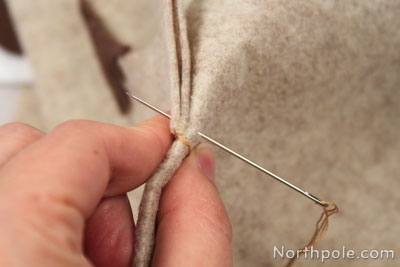
Note: If this body piece looks a little warped from sewing on the tail, gently tug the sides of the body to smooth it out.
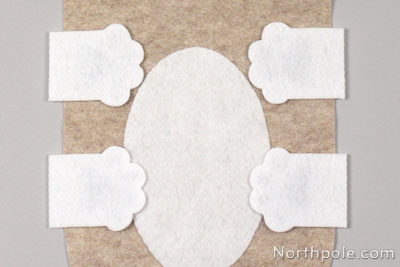
Assemble the Pieces:
- Now it is time to put all the pieces together (except the ears—you’ll sew those on later.).
- Place the front body piece on table facing up.
- Place the paws on the body facing down, as shown. The straight edge of each paw should extend about 0.25" past the edge of the body.
- Place the collar (rope) across the body so that the ends extend past the sides of the body.
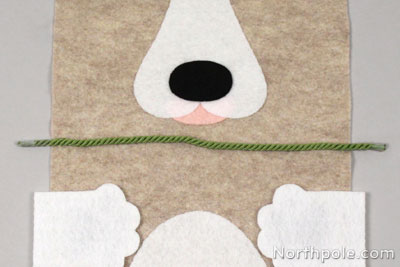
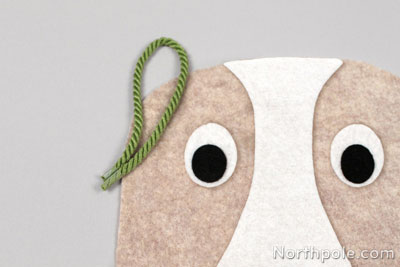
- For the stocking hanger, fold the other piece of rope in half and place near the upper left “corner” of the body piece. The loop should overlap the face, and the ends should extend past the side of the doggie’s face.
- Carefully place the back body piece (tail side down) on top of all the other pieces. Make sure the paws and the rope don’t shift around.
- Use straight pins to hold everything in place.
- Take note of where you will start and finish sewing the stocking (see template). Mark with a pin, marker, or tailor’s chalk. The start/finish sewing points are important, as you want the stocking opening to be centered.
- Using your sewing machine, begin sewing with a 0.25" seam allowance. Back tack to lock the thread and continue sewing.
Note: An easy way to get a 0.25" seam allowance is to align the edge of the felt with the presser foot.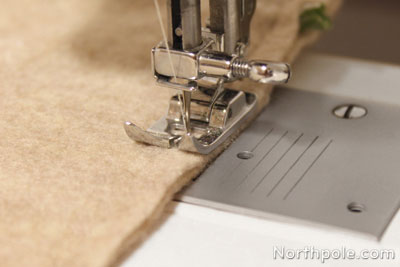
- Sew around the stocking, removing pins as you go. As you sew the final stitches, back tack to lock the thread.
- Trim thread and turn the stocking right side out. Press with a cool iron.
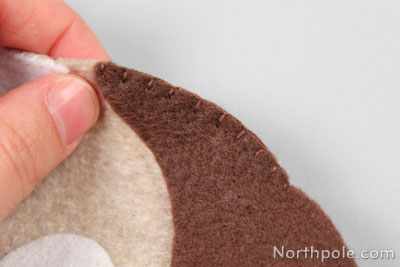
- Place the ears on the face and pin in place. The top of the ear should line up with the stocking opening.
- Hand sew the ears in place with brown thread. We used a blanket stitch, but a whip stitch will work as well. You only need to sew the upper part of the ear—approximately 2" of the top of the ear. Sewing down only part of the ear keeps it floppy and adorable.
- Now the doggie part is done, and all you need to do is make his name tag.
Make the Doggie’s Name Tag:
- Take the dog bone pattern piece and write your dog’s name in the center of the bone.
Note: Keep in mind that when Shrinky Dinks bake in the oven, they shrink A LOT! Thin lines will look even thinner, so we recommend drawing block letters for your doggie’s name. But if your pup has a really long name like Bartholomew, then thin letters might be best for you.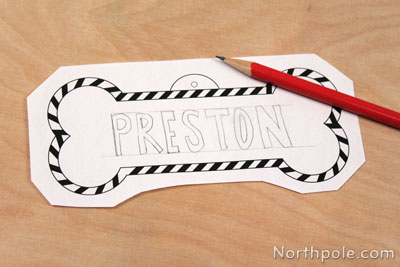
- Place a sheet of Shrinky Dinks on your work surface, rough side facing up.
- Place the pattern piece face down on the Shrinky Dinks sheet. Tape it in place.
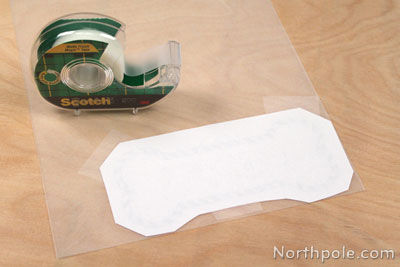
- Flip the sheet of Shrinky Dinks over so that the shiny side is facing up.
- Using the red permanent marker, trace all the black lines of the pattern piece. Fill in the letters and stripes.
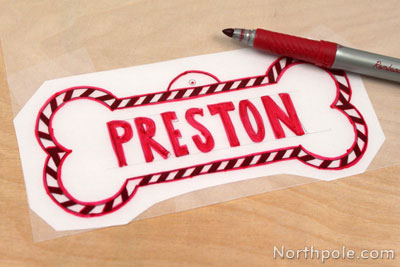
- Flip the sheet of Shrinky Dinks over so that the rough side is facing up. Remove the paper and tape.
- Color the bone with a white colored pencil. Don’t worry about staying in the lines as you will be cutting out the shape shortly.
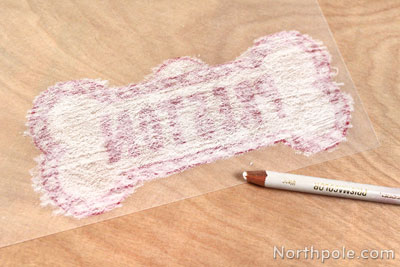
- Flip the Shrinky Dinks sheet back over and cut out the bone.
- Using the one-hole punch, cut a hole in the tab.
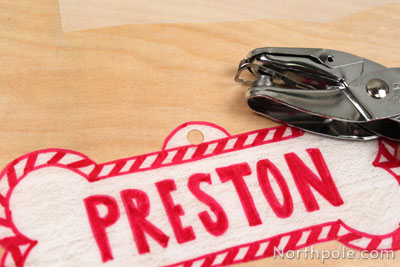
- Bake the bone in the oven per the manufacturer’s directions. Remove from oven and let cool.
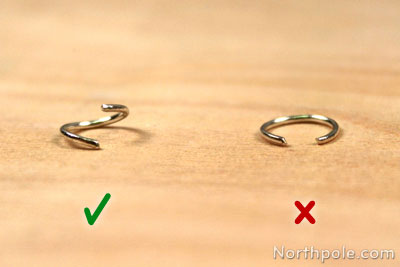
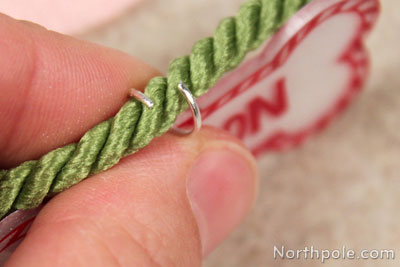
- Take the jump ring and open it. Typically, you need pliers to open jump rings, but this one is so large that you can easily open it with your fingers. To open/close the jump ring, move one side up and the other side down. If you were to simply spread open the gap in the jump ring, you risk warping the ring.
- Slide the jump ring through the hole in the dog’s name tag.
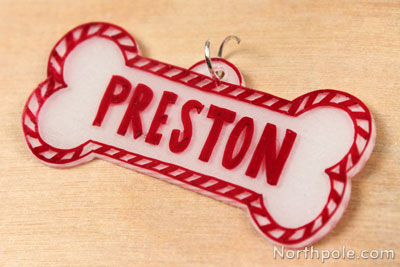
- Push collar (rope) through the opening of the jump ring.
- Close the jump ring.
- Now your doggie stocking is complete!

Elfy Hints:
- The toes are small, and it can be difficult to trace and cut each one, so try this method instead: Cut 16 little bitty rectangles and then round off the corners.
- If you decide to use black felt for the toes/paw pads, you’ll find it difficult to trace the template shapes since black marker doesn’t show up on black felt. So here’s a nifty little trick: Trace the paw pad on white felt and cut out. Place the white paw pad on black felt. The felt sticks to itself pretty well, so you don’t need to use pins to hold it in place. Cut around the white paw pad to make a black paw pad. Repeat to cut out the remaining 3 paw pads.