Skill Level:
Crafting Time:
Technique(s):
Material(s):
Category:
Sewing Ornaments: The Final Steps
Share This Craft
Search Crafts
Sewing Ornaments: The Final Steps
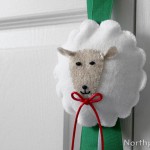
Like any good crafter (or elf!), after you’ve spent a decent bit of time making your hand-sewn ornament, you want to put the same amount of attention into finishing it. But how do you sew the final stitches, tie off the thread, and hide the knot inside? The technique detailed below is useful when you want your project to look polished on all sides, such as with an ornament. In this tutorial, we will illustrate this technique with felt, so just keep in mind that when we refer to “felt,” you can substitute with whatever material you choose (fabric, fleece, etc.).
Directions:
- As you are finishing your craft and are approaching your first stitches, be mindful of the unsewn space and try to calculate the number of stitches remaining. You want the stitches to look consistent and evenly spaced.
- Locate the thread tail from your first stitch and pull it so that it is hanging outside the ornament. We’ll call this the “tail 1.”

- As you finish your last stitch, poke needle through one layer of felt. The needle should be in between the two layers of felt.

- Pull the needle/thread through the felt, and then take the needle off the thread. We’ll call the thread from your final stitch “tail 2.”

- Tie tail 1 and tail 2 together with a double knot.

- Poke the needle in between the layers of felt to hide the tails, one at a time.
Note: For the shorter tail (tail 1), poke the needle in the felt first, and then insert thread through the eye of the needle.
- Pull needle through center of the project. Pull the thread tight so that the project scrunches a little bit, and then cut the thread. Scrunching the project slightly will cause the thread to disappear when the project returns to its original shape.

- Repeat steps 6 and 7 to hide the other tail.
- Now you’re all done!

Ready to Start Crafting? Check Out Some Projects That Use This Technique:
- ‘Tis the Season Fir Trees
- A Nosy Basset Hound
- An Apple for Teacher
- Baby's First Christmas Ornament
- Bart the Polar Bear
- Chipper Christmas Birdie
- Christmas Finger Puppets
- Cozy Felt Coasters
- Cute as a Cupcake
- Delicious Doughnuts
- Felt Holiday Hearts
- Felt Linzer Sable Ornaments
- Felt Starburst Ornament
- Felty, Fluffy Peppermint
- Fleece Navidad!
- Friendly Felines
- Fuzzy Felt Owl Ornament
- Fuzzy Pillow Ornaments
- Jolly Gingerbread Man
- North Pole Jam Pie
- Perry the Penguin
- Playful Puppies